Panels
mRemoteNG is using tabs and panels to stay organized but also to create a better view of all multitasking that is being done inside the application.
Explanation
Panels are used to organize tabbed conections. This might seem a bit confusing at first glance but is a great way to stay organized. Below is a few examples of how to use panels to give you a hands on better view of them:
- Test and Production - You can add 2 panels where you have test servers in one panel and production connections in the other
- Datacenters - Maybe you want to divide panels into different datacenters
- Temp project - To see all servers you work on for a temporary project
- Home vs Work - Or divide them up into where home connections are and work connections are located
As you can see the panels organization do have benefits to it. Below you will see a screenshot of a organized view where Domain A is in panel 1 and Domain B is in panel 2.

Example two panels created with Domain A and Domain B
The function of a panel works as a sort of workspace.
Creating Panels
Usually panels are created using connections and folders to stay organized automatic when making connections. However you can also create panels manually.

Menu items for panels under View
Creating manual panels will make you able to organize tabs manually in mRemoteNG. To then open a connection to the new panel, right click on the connection and use
The other option in the menu name Connection Panels will list all panels that are available in mRemoteNG window.
More Options
If you right click on the panel there are a few more options that can be set:
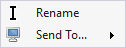
Right click context menu for panel
- Rename - Rename the panel
- Send to… - Send the whole panel to monitor/screen [number]. Note this is not a real window but a detachable panel. If you double click the title then the panel will go back to mRemoteNG window and not fullscreen the window.